Introduction
Connecting your Ender 3 to a PC can significantly enhance your 3D printing experience. Whether you’re looking to update firmware, adjust printer settings, or manage your prints with software like Cura or Pronterface, understanding how to establish a successful connection is crucial. This guide will walk you through the process step-by-step, ensuring that you can effectively connect your Ender 3 and take full advantage of its capabilities.
Understanding the Importance of Connecting Your Ender 3 to a PC
Connecting your Ender 3 to a PC allows for greater control and customization of your 3D printing experience. With a direct connection, you can:
- Update firmware more easily, ensuring your printer operates with the latest features and improvements.
- Utilize powerful software options like Cura and Pronterface for better print management, including slicing models and monitoring print progress.
- Troubleshoot issues more effectively by accessing printer logs and settings directly from your computer.
Establishing a connection opens up a world of possibilities, making it essential for any Ender 3 user.
Overview of Ender 3 and Its Compatibility with PC
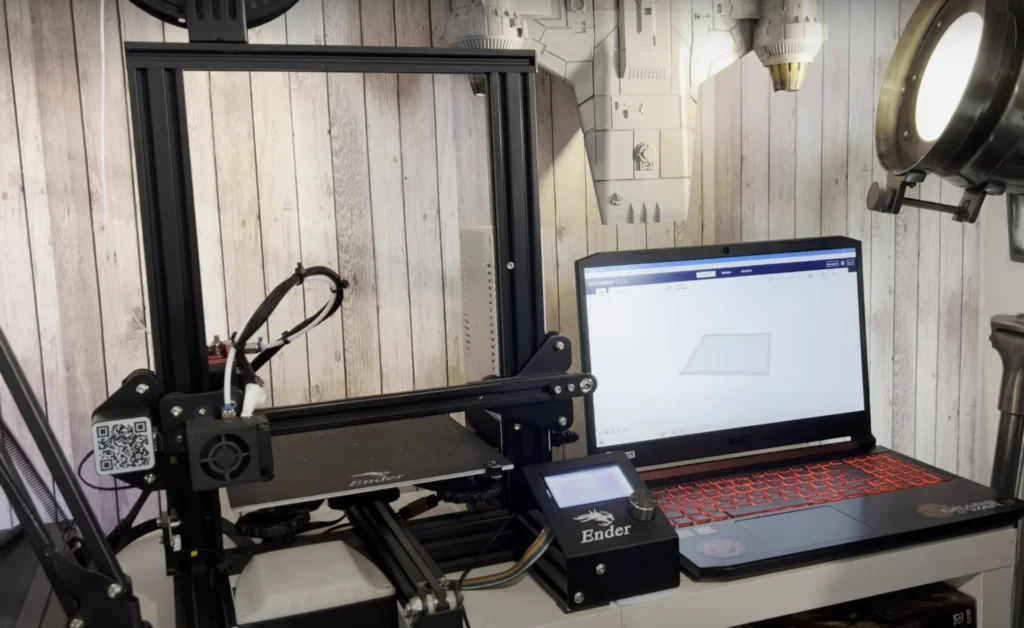
The Ender 3 is a popular choice among 3D printing enthusiasts, known for its affordability and high-quality prints. Compatible with various operating systems, What Three Parts Of A Computer Can Accept Input – Complete Overview including Windows, macOS, and Linux, the Ender 3 can be easily connected to a computer using a USB cable. This compatibility ensures that you can utilize a range of software applications designed to enhance your 3D printing experience, whether you’re a beginner or an experienced user.
Preparation for Connection
Before connecting your Ender 3 to a PC, it’s important to prepare both the printer and the computer. This section will guide you through what you need to do to ensure a smooth setup.
What You Need to Connect Your Ender 3 to a Computer
To connect your Ender 3 to a computer, you will need the following items:
- A compatible USB cable: The Ender 3 typically uses a USB Type B to Type A cable.
- A computer: Ensure that your computer has USB ports and is running an appropriate operating system.
- Software: You’ll need to download and install relevant software, including drivers and control applications like Cura or Pronterface.
Choosing the Right USB Cable for Your Ender 3
Selecting the right USB cable is crucial for a stable connection. The Ender 3 requires a USB Type B to Type A cable. These cables are widely available, so be sure to choose one that is of good quality to avoid connection issues.
Preparing Your Ender 3 for PC Connection: A Checklist
- Ensure your Ender 3 is powered on.
- Confirm that the printer’s firmware is up to date.
- Gather the necessary software and drivers for installation.
- Check the USB cable for any damage before use.
Installing Required Software
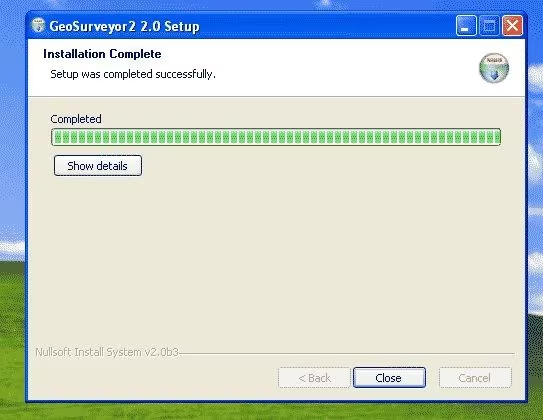
Once you’ve gathered your materials, the next step is to install the necessary software to facilitate the connection.
Step-by-Step Guide to Installing Drivers for Ender 3
- Visit the Creality Website: Navigate to the support section to find drivers specifically for the Ender 3.
- Download Drivers: Choose the appropriate drivers for your operating system (Windows, macOS, Linux).
- Install Drivers: Follow the on-screen instructions to install the drivers on your computer. A successful installation will ensure that your computer recognizes the Ender 3 when connected.
How to Download and Install Cura for Ender 3
Cura is a powerful slicing software that allows you to prepare your 3D models for printing. To install Cura:
- Go to the Ultimaker Cura Website: Download the latest version of the software compatible with your operating system.
- Run the Installer: Follow the installation prompts to install Cura on your computer.
- Configure the Ender 3 Profile: Once installed, you can set up a new printer profile for your Ender 3 within Cura, making it easier to manage your prints.
Setting Up Pronterface for Ender 3 Control via PC
Pronterface is another popular software option for controlling your Ender 3. To set it up:
- Download Pronterface: You can find it within the Repetier software package.
- Install the Software: Follow the installation instructions provided on the website.
- Connect to Your Ender 3: Launch Pronterface and select the correct COM port corresponding to your printer.
Connecting the Ender 3 to PC
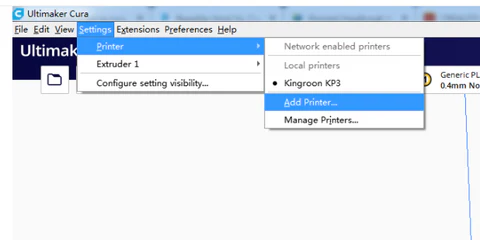
Now that you have your software installed, let’s connect your Ender 3 to your computer.
How to Physically Connect Your Ender 3 to a PC
- Locate the USB Port: Find the USB Type B port on your Ender 3, usually located on the side or back of the printer.
- Connect the USB Cable: Plug one end of the USB cable into the Ender 3 and the other end into a USB port on your computer.
- Power On the Printer: Ensure that the Ender 3 is powered on and that the computer recognizes the connection.
Configuring the USB Connection: Step-by-Step Instructions
- Open Device Manager: On Windows, right-click on the Start menu and select Device Manager. Look for “Ports (COM & LPT)” to confirm that your Ender 3 is recognized.
- Identify the COM Port: Take note of the COM port number assigned to your Ender 3. This will be used in your software settings.
- Configure Software Settings: In Cura or Pronterface, select the identified COM port and set the baud rate to 115200 for proper communication.
Using the Right USB Port Settings for Your Ender 3
Ensure that the software you are using matches the settings for the USB port. Most commonly, you’ll use a baud rate of 115200. If you experience communication issues, try adjusting the baud rate in the software settings to see if it resolves the problem.
Configuring Your Software
With the physical connection established, it’s time to configure your software for optimal control of your Ender 3.
Setting Up Cura for Ender 3: Initial Configuration
- Create a New Printer Profile: Open Cura and navigate to the printer settings.
- Input Printer Specifications: Enter the build size, nozzle diameter, and other relevant specifications for your Ender 3.
- Save the Configuration: Ensure your settings are saved to avoid having to re-enter them for future prints.
How to Use Cura to Control Your Ender 3
Using Cura, you can slice your 3D models and send them directly to the Ender 3. To print from Cura:
- Load a 3D Model: Import your 3D model into Cura.
- Slice the Model: Adjust settings as needed, then click “Slice.”
- Send to Printer: Once sliced, you can either save the file to an SD card or send it directly to the Ender 3 via USB, depending on your setup.
Configuring Pronterface for Seamless Communication with Ender 3
- Open Pronterface: Launch the software after ensuring your Ender 3 is connected.
- Select COM Port: Choose the correct COM port from the dropdown menu.
- Connect to Printer: Click the “Connect” button to establish communication with your Ender 3.
Flashing Firmware
Flashing new firmware is a vital part of maintaining your Ender 3, ensuring it runs smoothly and takes advantage of new features.
How to Flash Marlin Firmware on Your Ender 3 Using a PC
- Download the Firmware: Obtain the latest version of the Marlin firmware compatible with your Ender 3.
- Install Arduino IDE: If not already installed, download the Arduino IDE to compile and upload the firmware.
- Open Firmware in Arduino: Open the downloaded firmware in Arduino IDE.
- Configure Firmware Settings: Adjust any necessary settings in the firmware to match your specific printer configuration.
- Upload the Firmware: Connect your Ender 3 and click the upload button in Arduino IDE to flash the firmware.
Step-by-Step Guide to Updating Ender 3 Firmware via USB
- Ensure Proper USB Connection: Confirm that your Ender 3 is connected to your PC.
- Compile Firmware: Compile the Marlin firmware in Arduino IDE to create the hex file.
- Upload Process: Select the appropriate board and port, then upload the compiled firmware to your Ender 3.
Troubleshooting Firmware Flashing Issues on Ender 3
If you encounter issues while flashing the firmware, consider the following troubleshooting steps:
- Check USB Connection: Ensure the USB cable is properly connected and functional.
- Verify COM Port: Double-check that you are using the correct COM port in Arduino IDE.
- Update Arduino IDE: Ensure you have the latest version of Arduino IDE installed to avoid compatibility issues.
Remote Control and Monitoring
Setting up remote control for your Ender 3 enhances your printing capabilities significantly.
Setting Up OctoPrint for Remote Control of Your Ender 3
Install OctoPrint
To begin utilizing OctoPrint for your Ender 3, you’ll first need to download and install it on a Raspberry Pi or any compatible device. OctoPrint is an open-source 3D printer management tool that provides a web interface for controlling and monitoring your printer remotely.
- Download OctoPi: The easiest way to get started is to download OctoPi, which is a Raspberry Pi distribution that comes pre-installed with OctoPrint. You can find it on the OctoPrint website.
- Prepare the SD Card: Once you’ve downloaded the OctoPi image, use software like Balena Etcher or Raspberry Pi Imager to flash the image onto an SD card (at least 8GB is recommended).
- Configure Wi-Fi (Optional): If you want to connect OctoPrint to your network, you can configure Wi-Fi settings before inserting the SD card into your Raspberry Pi. Open the
octopi-wpa-supplicant.txtfile on the SD card and fill in your Wi-Fi credentials. - Insert the SD Card: After flashing the image and making necessary configurations, insert the SD card into your Raspberry Pi.
- Power On: Connect your Raspberry Pi to power. It will boot up and start running OctoPrint.
Connect to Ender 3
Once OctoPrint is up and running on your Raspberry Pi, the next step is to connect it to your Ender 3.
- Connect the USB Cable: Use a USB cable to connect your Ender 3 to the Raspberry Pi. This connection allows OctoPrint to communicate directly with your 3D printer.
- Access OctoPrint Interface: Open a web browser on your computer or device connected to the same network as the Raspberry Pi. Type the IP address of your Raspberry Pi (you can find this in your router settings or by using an app like Fing). You should see the OctoPrint interface.
- Select Your Printer: The first time you access OctoPrint, you’ll be prompted to set up your printer. Choose “Creality Ender 3” from the list of pre-configured printer profiles. This will automatically configure the necessary settings for your Ender 3.
- Test Connection: Once you’ve selected your printer, click on the “Connect” button in the OctoPrint interface. If everything is set up correctly, you should see a confirmation that OctoPrint is connected to your Ender 3.
- Calibration: It’s a good idea to calibrate your printer through OctoPrint. Use the provided tools to check the bed leveling and ensure that the printer is ready for its first print.
How to Monitor Your Ender 3 Prints from a PC
With OctoPrint set up and connected to your Ender 3, you can now monitor your 3D prints from your PC or any device connected to the internet.
- Access the OctoPrint Web Interface: Log into OctoPrint from your web browser. You can monitor print progress in real-time, see the current temperature of your hotend and heated bed, and even control the printer directly from your PC.
- Start a Print Job: You can upload G-code files through the web interface and start a print job directly from your PC. OctoPrint allows you to queue multiple print jobs and manage them effectively.
- Live Streaming (Optional): If you want to monitor your prints visually, consider adding a webcam to your setup. You can set up a webcam to stream video directly to the OctoPrint interface, allowing you to keep an eye on your prints from anywhere.
- Notifications: Set up notifications within OctoPrint to alert you when a print is completed or if there are any issues during the printing process. This feature is particularly useful if you’re managing multiple prints or are away from your workspace.
Using a Raspberry Pi with OctoPrint to Control Your Ender 3
Using a Raspberry Pi with OctoPrint provides a powerful platform for controlling your Ender 3. Here’s how to maximize this setup:
- Enhanced Control: With OctoPrint, you can control your printer remotely, adjust settings, and even pause or stop prints from anywhere within your network.
- Plugins for Added Functionality: OctoPrint supports a variety of plugins that can enhance your printing experience. These plugins can provide features like slicing within OctoPrint, advanced monitoring, and integration with services like Google Drive.
- Print Scheduling: If you have a busy schedule, OctoPrint allows you to schedule print jobs. You can set times for when to start and stop prints, making it easier to manage your 3D printing workflow.
- Remote Access: For advanced users, OctoPrint can be configured for remote access, allowing you to monitor and control your Ender 3 even when you are away from home. Be sure to secure your connection to prevent unauthorized access.
Troubleshooting Common Issues
Despite its user-friendly interface, you may encounter some issues when connecting your Ender 3 to a PC or using OctoPrint. Here are some common problems and solutions:
Common Connection Issues and How to Fix Them
- USB Connection Problems: If your Ender 3 isn’t connecting to your PC, ensure that the USB cable is securely plugged in and not damaged. Try using a different USB cable or port if needed.
- Driver Issues: Ensure that you have installed the correct drivers for your Ender 3. You may need to reinstall them or check for updates.
- Printer Not Recognized: If your printer isn’t recognized in OctoPrint, check that it’s powered on and properly connected. Restarting both the printer and the Raspberry Pi can sometimes resolve connectivity issues.
Troubleshooting USB Connection Problems with Ender 3
- Check Serial Port: Ensure that the correct serial port is selected in OctoPrint. This setting is crucial for establishing a connection.
- Baud Rate Settings: The baud rate in OctoPrint should match the baud rate of your Ender 3, typically set to 115200. Adjust it if necessary.
- Firmware Updates: Sometimes, updating the Marlin firmware on your Ender 3 can help resolve connectivity issues. Check the Creality website or community forums for the latest firmware.
How to Resolve Driver Installation Issues for Ender 3
- Reinstall Drivers: If you are experiencing issues, try uninstalling and reinstalling the USB drivers for your Ender 3.
- Compatibility Check: Ensure that the drivers are compatible with your operating system. For Windows 10 users, the drivers should automatically install when you connect the printer.
- Device Manager: Use Device Manager on Windows to check for any issues with the driver installation. You might see a yellow exclamation mark next to the device, indicating a problem that needs to be addressed.
Advanced Features
Using Ender 3 with Multiple Software: A Comparison
While Cura and Pronterface are popular choices for controlling your Ender 3, other software options are also available, including Repetier-Host and Simplify3D. Each software comes with unique features, so it’s beneficial to explore them based on your needs.
- Cura: Known for its user-friendly interface and extensive material profiles, Cura is an excellent choice for beginners.
- Pronterface: Offers more direct control over printer settings, making it suitable for advanced users who want to fine-tune their prints.
- Repetier-Host: Combines features of both slicing and printing control, offering a comprehensive solution for managing 3D prints.
How to Configure Ender 3 for Advanced Features via PC
Utilizing advanced features like remote monitoring, multi-material printing, and custom firmware modifications can enhance your 3D printing experience.
- OctoPrint Plugins: Explore and install various plugins for OctoPrint, such as the Bed Visualizer or Print History, to gain deeper insights into your prints and improve functionality.
- Firmware Customization: Users familiar with coding can customize their Marlin firmware to enable advanced features like linear advance or sensorless homing, enhancing print quality and efficiency.
- Calibration and Tuning: Regular calibration using tools available in your chosen software can significantly improve print accuracy and quality.
Understanding Serial Port Communication with Ender 3
When connecting your Ender 3 to a PC, understanding serial port communication is essential. Serial communication allows your computer to send commands to the printer and receive feedback. This connection can be critical for troubleshooting and optimizing print performance.
- Baud Rate: The speed of communication between the printer and the PC, typically set at 115200 for the Ender 3. Make sure this setting is consistent across your software and printer settings.
- Flow Control: Ensures that data is sent and received without errors. Adjusting flow control settings can help prevent communication issues.
Best Practices
Tips for a Smooth Connection Experience with Your Ender 3
- Keep Software Updated: Regularly check for updates for OctoPrint, Cura, and your Ender 3 firmware to ensure you have the latest features and bug fixes.
- Cable Management: Proper cable management can prevent wear and tear on your USB connections. Use cable ties or clips to secure your cables neatly.
- Regular Maintenance: Ensure your printer is regularly maintained to prevent issues. This includes cleaning the nozzles, lubricating moving parts, and checking for loose connections.
Best Practices for Maintaining Your Ender 3’s PC Connection
Backup Configurations
Regularly back up your printer settings and profiles within your software to avoid losing configurations. Here are some effective ways to manage backups:
- OctoPrint Backups: OctoPrint has a built-in backup feature. Go to the settings menu and look for the “Backup & Restore” section. Create backups of your settings regularly and store them in a safe location.
- Export Profiles: If you’re using slicing software like Cura, you can export your printer profiles and material settings. This way, if you need to reinstall the software or switch devices, you won’t lose your customized settings.
- Document Changes: Keep a log of changes you make to printer settings or firmware. Documenting modifications can help you revert to a previous configuration if something goes wrong.
Monitor Performance
Using the monitoring features in OctoPrint can help keep track of your Ender 3’s performance and print quality. Here are some tips for effective monitoring:
- Temperature Monitoring: Regularly monitor the temperature of the hotend and heated bed to ensure they remain stable throughout the printing process. This can help prevent issues like warping or poor adhesion.
- Print Time and Progress: Keep an eye on the estimated print time and progress displayed in OctoPrint. If you notice any significant delays, it may indicate an issue with the printer or the G-code.
- Webcam Streaming: If you’ve set up a webcam, use it to visually monitor your prints. This allows you to catch any issues early, such as layer separation or print failures.
- Check Logs: OctoPrint maintains logs of print jobs, errors, and system performance. Regularly check these logs to identify recurring issues and make necessary adjustments.
Regular Software Updates
To ensure optimal performance and security, keep your software up to date. Here’s how to effectively manage updates:
- OctoPrint Updates: Check for updates to OctoPrint regularly. You can do this directly from the OctoPrint interface. New updates often include bug fixes, new features, and improved security.
- Slicing Software Updates: Similar to OctoPrint, keep your slicing software (e.g., Cura) updated to benefit from improved algorithms and features that can enhance your printing experience.
- Firmware Updates: Ensure that your Ender 3 firmware is also kept up to date. Check the Creality website or community forums for any new firmware releases and follow the installation instructions carefully.
Optimize Your Print Settings
Fine-tuning your print settings can lead to better print quality and fewer issues. Here are some strategies for optimizing your settings:
- Adjust Layer Heights: Experiment with different layer heights based on the type of print you are producing. Lower layer heights can result in better detail but may increase print time.
- Temperature Settings: Test various temperature settings for both the hotend and heated bed to find the optimal temperatures for different filament types. This will help improve adhesion and reduce stringing or oozing.
- Print Speed: Adjust print speed according to the complexity of your model. Slower speeds can enhance print quality, especially for intricate designs, while faster speeds can be used for simpler models.
- Retraction Settings: Fine-tune retraction distance and speed to minimize stringing. Test these settings to find the best balance between print speed and quality.
Clean and Maintain Your Hardware
Regular maintenance of both the Ender 3 and the Raspberry Pi will help ensure smooth operation and longevity. Here are some maintenance tips:
- Keep the Printer Clean: Regularly clean the print bed, nozzle, and any accessible parts of the printer. Dust and debris can affect print quality and cause hardware issues.
- Lubricate Moving Parts: Periodically lubricate the rails and lead screws of your Ender 3 to ensure smooth movement. This can help prevent wear and tear and extend the life of your printer.
- Inspect Wiring: Regularly check the wiring and connections between your Ender 3 and Raspberry Pi. Look for signs of wear or damage that could affect performance.
- Power Supply Checks: Ensure that the power supply for your Ender 3 is functioning properly. Fluctuations in power can cause printing issues or even damage the printer.
Community Engagement and Support
Engaging with the 3D printing community can provide valuable insights and support. Here’s how to connect with others:
- Join Online Forums: Participate in forums like Reddit’s r/3Dprinting or dedicated Facebook groups. Sharing experiences and troubleshooting tips can help you learn from others.
- Attend Meetups and Workshops: Look for local maker spaces or meetups where you can connect with other 3D printing enthusiasts. This is a great way to learn new techniques and get hands-on support.
- Follow Tutorials and Guides: There are many YouTube channels and blogs dedicated to 3D printing. Following tutorials can help you improve your skills and discover new features of your equipment.
- Contribute to the Community: If you find solutions to common problems or have tips to share, consider contributing back to the community. Sharing your knowledge can help others and foster a collaborative environment.
Conclusion
Setting up and maintaining a remote control setup for your Ender 3 using OctoPrint can significantly enhance your 3D printing experience.
By following the steps outlined above—installing OctoPrint, connecting your printer, and implementing best practices for monitoring, maintenance, and community engagement—you can achieve greater efficiency, improved print quality, and a deeper understanding of your 3D printing capabilities. Whether you’re a beginner or an experienced user, OctoPrint offers a wealth of features to help you optimize your workflow and elevate your projects. Happy printing!
FAQS, how to connect ender 3 to pc
1. What are the steps to connect an Ender 3 to a PC?
To connect an Ender 3 to a PC, follow these steps:
Install slicing software (such as Cura or PrusaSlicer) on your PC.
Use a USB cable to connect the printer to your PC.
In the slicing software, select the correct COM port and baud rate (usually 115200).
Ensure the printer’s firmware is up-to-date.
2. Do I need specific software to connect my Ender 3 to a PC?
Yes, you need 3D printing slicing software like Cura, PrusaSlicer, or Simplify3D. These programs allow you to send G-code files to your Ender 3 and manage print settings directly from your PC.
3. What kind of USB cable is required to connect an Ender 3 to a PC?
The Ender 3 typically requires a standard USB Type A to USB Type B cable, similar to those used for connecting printers to computers.
4. Can I control the Ender 3 printer from my PC?
Yes, after connecting the Ender 3 to your PC using slicing software, you can control various functions such as moving the axes, starting prints, and monitoring temperatures from your computer.
5. Why isn’t my PC recognizing the Ender 3 after connecting?
If your PC doesn’t recognize the Ender 3, try these troubleshooting steps:
Make sure the USB drivers are installed.
Check the USB cable for damage.
Try a different USB port or cable.
Ensure the correct COM port is selected in your slicing software.


